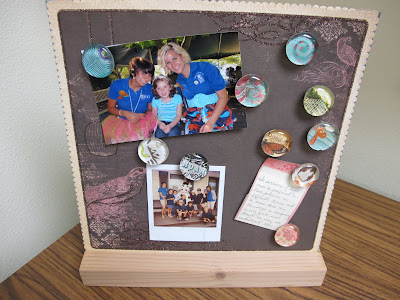
so crafts are my favorite thing. in my mind, a fun activity is to start crafting after lunch and keep crafting late into the night. usually i like these craft days to involve friends, buffy, and chipotle.
a magnetic message board with cute glass magnets! so let's break this down a little bit. it's very easy, and totally fun!
first, the message board part. you need:
- a big sheet of metal, this one is about 12"x12"
- glue (elmers will do)
- paper to cover the metal (i just used a single piece of 12"x12" paper)
- block of wood (alternatively, you could attach some string or wire and hang it)
in order to get the glue to lay flat, i used a sponge brush and watered down the glue just a little bit, so it was more easily spreadable. cover the sheet evenly with glue, then stick on your paper! that part is done. so easy.
now the next part, making the magnets, is probably more important because you can use them with or without the magnetic board....on your fridge, metal desk, and anywhere else far away from your computer. for these, you need:
- glass drops or glass gems (often used for home decorating)
- diamond glaze or another clear paper adhesive
- paper of your choosing (preferably a little thicker)
- magnets
- hot glue gun
for this, put a small circle of diamond glaze on the back of the glass drop, in the center. it doesn't have to cover the whole drop. immediately (or pretty quickly) press it down onto the part of the paper that you want to see through the glass. press it down so the glaze spreads over the whole back of the drop. let it dry (should only be a couple minutes), then cut the paper around the glass drop. use a hot glue gun to fix magnets to the back of the paper.
and voila! so simple! here's the craft warehouse instructions for the magnets, though they do it a little differently. both ways work! let's look at some pictures of the final product...
i'm a big fan. they're completely addictive because they only take a couple seconds each to make, and they're wonderful gifts. you can also use stickers to write words on the paper, or use your own art! (these are all made from craft paper). before you commit to a design, try moving the glass drop over a couple different areas of the paper - that way you can get a sense for how it'll look before you apply the glaze!
good luck!! happy crafting!


Love this idea! :) You're amazing.
ReplyDelete